In this tutorial you will learn how to model a basic low-poly character. The character I will be making is a basic Human male, although characters of any shapes can be made using these methods.
The Head
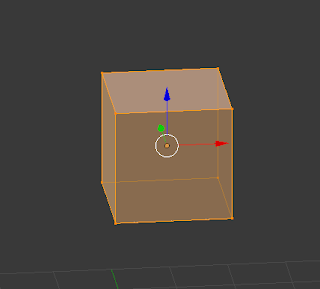 |
| Start with a cube. |
To begin with, just add a basic cube mesh using Shift-A. This will be your character's head.
 |
| Subdivided cube. |
 |
| We will spend the majority of this tutorial in Edit Mode. |
Next we need to switch to edit mode by pressing the Tab key, or by Smooth Subdivide the shape, which will transform the cube into a more spherical shape. To do this, select the entire shape by pressing A, press W on your keyboard to bring up the Special Menu and select Subdivide Smooth twice.
 |
| Scaling the head. |
Once that is applied, we want to change the shape to closer resemble a head. Using NUMPAD 5 to switch to Orthographic View and NUMPAD 1 to view from the front, scale the shape inwards on the X axis to thin it, then scale it on the Z axis to make it taller. This can be done by pressing S to scale and then X and Z for their respective Axis'.
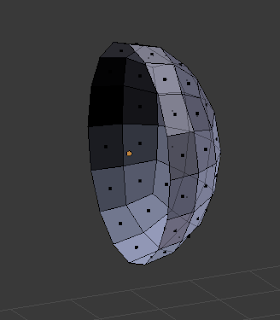 |
| Cutting the shape in half. |
 |
| Applying the mirror modifier. |
 |
| Vertex select. |
 |
| Limit selection to visible. |
After scaling it we are now going to delete half of it. Viewing from Front Orthographic and in Edit Mode, switch to Vertex Select mode, deactivate Limit Selection to Visible, which allows you to view and select vertices, edges and faces through others, and use Box Select, the B key, or Paint Select, the C key, to select all of the vertices on either side of the shape. Press either the X or the Delete key, and select the option for vertices. Once half of the shape is gone, select the half that is left, go to the modifier panel and add a Mirror Modifier. Before clicking "Apply", make sure to select the options shown in the image above, especially Clipping as this will prevent the two sides from overlapping. The mirror modifier adds a mirror image of your shape that copies all changes made on the mesh.
 |
| Creating the chin. |
After applying the mirror modifier we now have to make the shape look like an actual head. To do this we'll start off by making a chin shape. Using Edge Select, found right beside vertex select, click on two edges on the lower part of the 'face' and then drag them down and out to form the chin.
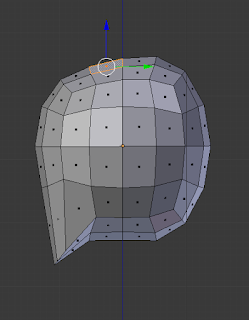 |
| Reshaping the top. |
 |
| Proportional editing. |
Next we will adjust the top of the head. Simply done, all you have to do is use the Face Select tool, similar to the Vertex Select and Edge Select, and move some of the faces on top downwards to give it a more natural shape. You can enable Proportional Editing to assist you in this, but make sure to disable it again when you're finished.
 |
| Editing the sides. |
The same needs to be done with the side of the head. Adjust it until you are happy.
 |
| Shaping the area the neck sprouts from. |
 |
| Bringing the lower back of the head upwards. |
As in the image above, adjust this part of the underside of the head. This will be the area that connects to the neck.
 |
| Selecting the faces to be removed. |
Once you are satisfied with the shape of the head, use Face Select to select the faces on the underside of the head, like the image above.
 |
| Deleting faces. |
With the faces selected, press X or Delete and select the option to delete faces.
 |
| Defining the jawline. |
In order to neaten up the edges left by the faces we deleted, we'll select the two edges at the corner of where the jaw connects to the side of the head. Pressing F will fill this area with a corner piece, and help round off the neck area.
 |
| Select the edges around the empty space. |
 |
| Define the seam between the head and the neck. |
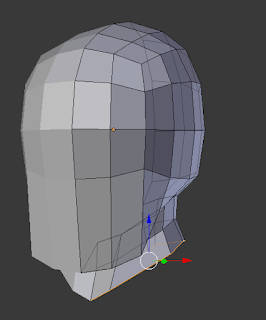
Once you're ready to finally move on from the head, Alt-Click any of the edges at the bottom to automatically select them all and extrude them slightly downward. Extruding is done with the E key, and to ensure they're moved straight down press the Z key to move them along the Z axis. A blue line should appear to indicated their path.
 |
| Extrude the neck. |
 |
| Scale bottom of neck inwards. |
Once they have been extruded, with the edges still selected use the directional arrows to move them inwards slightly.
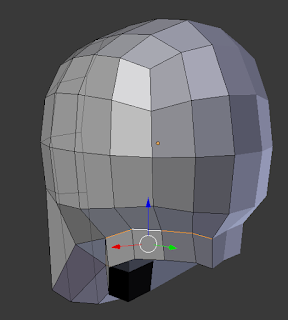 |
| Scale top of neck inwards. |
Select the edges above your neck and move them in slightly as well.
 |
| Extruding from neck again. |
 |
| Scaling bottom outwards. |
Extrude from your neck and move these new edges outwards this time.
 |
| Extruding downwards. |
 |
| Scaling outwards to make shoulders. |
 |
| Head is finished. |
Extrude once more straight downwards and then move these edges out much further. These will be your shoulders.
The Torso
 |
| Extruding down, scaling inwards. |
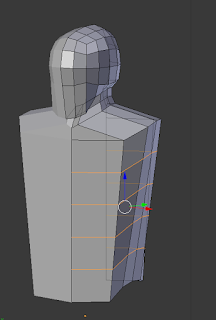
Extrude down from the edges that form your shoulders to create your torso. You can adjust the width of the waist by using the arrows before continuing, but this can be changed later after you've figured out your proportions.
 |
| Adding loop cuts. |
This is when we'll first use the Loop Cut tool, a tool we will use many times during this tutorial. To use the Loop Cut tool, select a vertex, edge or face and press Ctrl-R. This will cause a pink line to appear that wraps around the object it's placed on. Before clicking anything you can move your mouse around to change the direction of the cut. We want ours to go horizontally across the torso. Use the mouse wheel to multiple the lines until you have four, then click to activate the placement mode. This will let you slide the loops up or down the torso, but we want them to be centered, so just right click to automatically place them centered.
 |
| Defining the chest. |
 |
| Defining the sides. |
 |
| Adding detail to the shoulder blades. |
Give the torso some depth and detail. This can be done in different ways, such as by bringing the chest out, adjusting the back to add shoulder blades, bringing the very center line on the back inwards, bringing one of the lower edges on the front upwards to emphasize the chest, and by adjusting the edges on the side to round off the sides of the torso.
 |
| Improving the curvature of the back. |
Add another Loop Cut To the body, but this time it will be vertical.
 |
| Adjusting edges on the side to create top of arm. |
 |
| Raising center vertex slightly. |
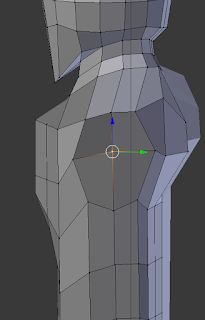
In preparation for the arms, use Vertex Select to pull vertices from around the side of the torso to form an almost round section like the image above. This is best done from right side orthographic view, and this new shape will be where our arms extend from.
 |
| Zooming out and assessing the model. |
 |
| Adjusting the waist. |
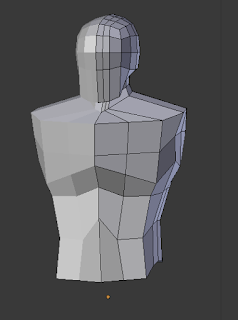
Before moving on to the arms, ensure that you are satisfied with the shape of your torso. Take this opportunity to shape and detail it. Just for fun I used the Inset Tool, the I key, to create insets on the chest and stomach that I used to give him more defined chest and stomach muscles.


 Reviewed by Tyrone Ward
on
January 31, 2019
Rating:
 Reviewed by Tyrone Ward
on
January 31, 2019
Rating:


