How to Create Custom Candles for Your Home

Candles are a lovely addition to any home as they immediately create an atmosphere of calm in any room they are in. Although you can buy candles from retailers, there is something satisfying about making candles of your own that you can display proudly throughout your home. From hand-dipped candles to stylish glass creations, there are many ways to make homemade candles to set up around your house. Read below for a complete how-to guide for creating custom candles for your home.
Supplies You Will Need to Get Started
Some of the supplies necessary for making candles can already be found in your house. If you have glass jars from old candles or even used up jam jars, those are free and convenient options to fill with wax. Other basic materials that you may have around the house include a thermometer to make sure you are getting the right wax temperature, wooden skewers to tie the wicks around while they dry, a pouring pitcher, a double boiler or a wax melter, and a stirring stick or spoon.
Once you have gathered these basic supplies, then it is time to head to the store to pick up the more essential materials like wax, wicks, fragrances, dyes, and pigments.
Start with Your Wax
Choosing the right wax for your homemade candles comes down to preference, price, and characteristics. No candle can begin without the wax, so read up on the differences in waxes below before you make your choice.
Soy Wax
Soy wax is a natural, eco-friendly option that burns cleanly and holds fragrance well. It is made from soy beans and is completely renewable, unlike some other wax options. It is quickly becoming one of the more popular candle wax options because it burns cleanly and slowly. The fact that it is a natural wax, made from plants, appeals to environmental activists, vegans, and others who just want to purchase more sustainable products. If you are looking for a wax that holds scents well and makes your home environment feel clean, then this is a good choice.
Paraffin Wax
A long time favorite, paraffin wax is affordable and has been widely used for a long time by commercial candle producers. This type of wax provides a strong scent throw and is the wax that most candle fragrances and dyes were tested on. Upon its discovery in the mid-1800s, paraffin wax became a much better substitute for candle making than tallow, which was very popular at the time, but didn’t burn as clean. Since then, it has been the most commonly used wax for candles because it is inexpensive to produce as it is a byproduct of refined petroleum.
Beeswax
This is a natural, slightly sweet-smelling wax that burns longer than most other types of wax. It is derived from honeycomb in a process where the material is heated up until the wax and the honey separate. Beeswax is a favorite among many because it burns brighter and cleaner than most other waxes and has a great natural smell. The one downside to beeswax is that it is on the more expensive side and can sometimes be harder to find than other options.
Coconut Wax
This wax, derived from coconuts, is similar to soy wax in that it is eco-friendly and sustainably sourced. Although coconut wax has been used for centuries, it has only recently gained popularity as a candle wax option. You can even purchase a complete candle making kit that comes with coconut wax and many of the materials you will need to make a standard scented glass candle. These kits and other coconut wax products are helping spread awareness of the benefits of buying coconut wax candles instead of other types.
Choose a Wick
The wick size and type determine how well your candle burns. The three most common wicks to use are cotton wicks, wooden wicks, and pre-tabbed wicks. Cotton and pre-tabbed wicks come in the shape of a string and can be cut to your preferred length. Wooden wicks resemble a miniature wooden plank and create a soothing crackling sound when burning. Make sure that the wick you choose is appropriately sized for your container to prevent tunneling or excessive smoking.
Find the Right Vessel
Your candle container should be heat-resistant and non-flammable. Popular choices include glass jars, ceramic bowls, metal tins, and even silicone molds for if you want to make pillar or shaped candles. Do a deep clean of the container and make sure it’s dry before pouring the wax.
Step-by-Step Instructions
Prepare Your Workspace
Start by covering your work surface with newspaper or parchment paper, then gather all materials in one place for easy access. Make sure you choose a room with good ventilation, especially when using fragrance oils, as they can be very potent.
Measure and Prepare Your Wax
Determine how much wax you need based on the size of your container and how many candles you plan to make. Measure out the required amount, keeping in mind that melted wax takes up less space.
Melt the Wax
For the best result, use a double boiler method. Fill a pot with water and place a heat-resistant pouring pitcher or metal bowl on top. Heat over medium heat until the wax melts completely. Stir occasionally for even melting. Monitor the wax temperature using a thermometer and remember that each type of wax has different melting points. Soy wax melts at 120–180°F (49–82°C), while paraffin wax melts at 130–190°F (54–88°C), and beeswax at 140–170°F (60–77°C).
Add Color and Fragrance
Add a few drops of liquid dye or shavings of dye blocks and stir well. Once the wax reaches around 170°F (76°C), add fragrance oil. Use 1 oz of fragrance per 1 lb of wax for a strong scent, then stir thoroughly for at least 1–2 minutes.
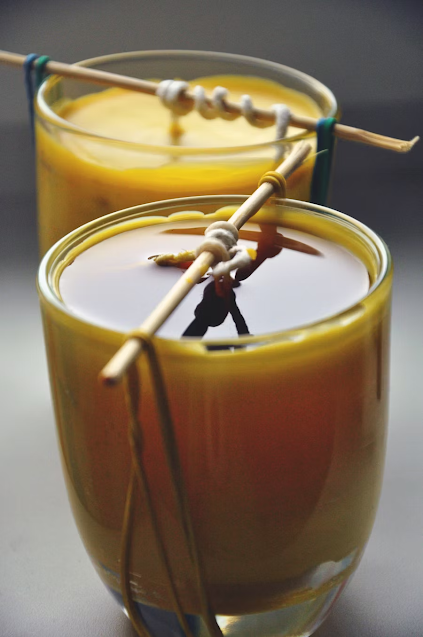
Prepare the Wick and Container
Secure the wick to the center of your container using a glue dot or wick sticker, then use a wick holder or skewer across the top of the container to keep the wick upright and in the same place.
Pour the Wax
Let the wax cool slightly to around 135–145°F (57–63°C) before pouring (this helps prevent sinkholes). Slowly pour the wax into your container, leaving a bit of space at the top. Hold the wick in place and make sure it remains centered.
Let the Candle Cure
Allow the candle to set undisturbed for at least 24 hours. If sinkholes form, reheat a small amount of wax and pour a thin top layer.
Trim the Wick and Finish
Trim the wick to about ¼ inch (6 mm) for a clean burn and then set the candle up wherever you want in your home, light it, and let the magic happen.
Follow Traditional Methods with Hand Dipping
If you are looking for a candle-making activity that is a bit more adventurous, try hand-dipping candles. It is a time-consuming, but soothing activity that can be fun to do with family members. For the best results, melt wax in a deep container and then take a long wick and hold it in the middle, allowing both ends to submerge and then remove it quickly. Allow the wax to cool for a minute before dipping again. Repeat the process until the desired thickness is achieved. When all is said and done, you will have beautiful tall candles that you can put in candleabras for the holidays or special occasions.
Candle-Making Pro Tips
Use a Hair Dryer
Once a cable has settled and dried, if you see irregularities on the surface where some wax dripped or the wick got rearranged, you can use a hair dryer to even out the surface of your candle to make it have a more appealing appearance.
Avoid Overheating
When making candles, do not let the temperature of the wax get too hot once you have added the fragrance oils, as excessive heat can weaken the scent.
Test Burn Your Candle
Before making large batches, make sure you are getting an even burn with the wax and other ingredients you have combined. This will ensure you don’t make a bunch of candles that don’t burn well.
Experiment with Layering
Layer different colors and fragrances for unique and fun results. You can do this by mixing hot wax in different containers so you can add different colors. Start with one color and let the wax fully harden, then add the next color and repeat until you have the design you want. This works best with a clear glass container so you can see your creation clearly.
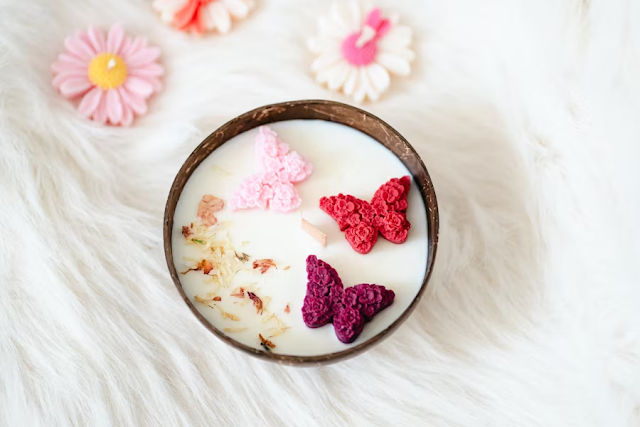
Create Fun Colors and Designs
After your desired scent is stirred into the wax but before it starts to harden, you can make fun designs by swirling in different colored dyes or completely change the color of the wax by adding a few drops of dye until you get your ideal shade. You can also add flower petals, wax molds, and other fun decorations to the top of your candles to make them personalized and fun.
Making custom candles at home is a rewarding and creative hobby. It is nice to be able to walk around your home and see all of your creations being used to create a cozy home environment. Think carefully about the materials you use and don’t be afraid to experiment with colors and scents. Follow proper techniques so that you don’t waste wax or injure yourself. With this guide you will be well on your way to creating high-quality candles for your spaces.
 Reviewed by Opus Web Design
on
March 10, 2025
Rating:
Reviewed by Opus Web Design
on
March 10, 2025
Rating:


